Sunday, August 30, 2015

SAQA Auction 2015


For the last five years I have contributed a 12 x 12 art quilt to the SAQA benefit auction. This 12-minute video scrolls through the more than 300 art quilts to be auctioned off beginning Friday, September 18, when bids of $1000 will be accepted.

My own contribution will be part of Group 1, and bidding for that group begins on Monday, September 21, starting at $750 and declining as the week progresses. It's always fun for contributors to follow the bidding. For more details please visit the auction website.

Postscript: Thank you to Andra Stanton of Boulder, Colorado for buying my auction piece at $350!

Wednesday, August 26, 2015

Through Our Hands, issue #6, now available on-line


For 76 pages of inspiring and innovative work with fibre, have a look at the latest issue of Through Our Hands, the British-based on-line journal of contemporary work in textiles.  Included are artist profiles, reviews of museum exhibits, and close to 100 images to delight and intrigue.

Sunday, August 23, 2015

Jane Davies colour class, Lesson #4

Here are the three 8 x 10 collages I produced for Lesson 4 of Jane Davies' on-line class, Unlocking the Secrets of Colour. I found this challenging, not because the colour theory is new to me, but because of the difficulty of making a satisfying composition.

Monochromatic collage
Using just one colour with its tints and shades is called a monochromatic colour scheme. (I find myself calling it monogamous. Monotonous?) The example above used various reds with white added. After completing the collage I went over the background with a transparent white, because most of my reds were middle-value, not many darks or lights, and everything was blending together.

Analogous collage
An analogous colour scheme uses two or more colours next to each other on the colour wheel. In this case, I worked with green-blue-violet, plus their tints and shades. Again, I used transparent white to lighten the background, to distinguish foreground from background. The idea with the composition was to have a large, a medium and two small shapes, all converging, but I don't think it was particularly successful. A little tweaking is definitely in order.

Complementary collage
Finally, this complementary colour scheme uses two colours opposite each other on the colour wheel, in this case yellow-green and red-violet, with their tints and shades. I find complementary schemes have a lot of energy. Usually it is best to have one colour dominant.

The collage papers came from old magazines. I spent far more time on these exercises than the assignment warranted, but I just tell myself that learning more about composition is time well-spent. I hope there will be some carry-over to my attempts at working in a more abstract format with fibre.

Wednesday, August 19, 2015

Jane Davies colour class, Lesson #3


Analogous colour study, using 3 hues next to each other on the colour wheel:
magenta, red and orange, along with white to make the tints
plus some collaged bits of paper
This week in the on-line course "Unlocking the Secrets of Colour", we are exploring the wonderful world of colour theory. First, we used paint to produce tints and shades of colours. We did this by taking a single colour straight from the tube, and then adding increasing amounts of black paint to it (shades) and increasing amounts of white paint to it (tints). See results below.


It's always fun to see how adding black to yellow produces olive green. Black is a very powerful pigment and just the tiniest bit makes a difference, which is why most hand-dyers never run out of their first purchase of black dye powder. When dyeing shades, only a few grains of black dye are needed. When dyeing tints, the quantity of dye is reduced.

Then we moved on to create secondary colours from primaries.

Usually, yellow + blue = green, yellow + red = orange,
and blue + red = purple
Actually, the result depends on exactly which red or blue you choose as your "primary".  Ultramarine blue mixed with red will produce something quite different from cobalt or manganese blue mixed with the same red.  I can achieve this effect with cloth by doing gradient dyeing: changing the proportions of dye colours in the dye bath.

And how do we get muddy earth tones? By mixing complementary colours, from opposite sides of the colour wheel.  I especially like the ochres I can get by mixing yellow and violet. I can achieve this effect with cloth by "over-dyeing", or by gradient dyeing, as above.

Then Jane Davies suggested we make little compositions using various colour schemes. A monochromatic scheme relies on one colour straight from the tube along with black and white to create shades and tints.

Pure cadmium yellow light, along with its tints and shades.
I used some collaged bits from old magazines too, for texture.
An analogous scheme, like the one shown at the beginning of this post, uses two or three colours found side-by-side on the colour wheel. And finally, a complementary scheme uses two colours found opposite each other on the colour wheel. Below is my effort using the opposites of yellow and purple.

with a few bits of paper collaged into place.
While this theory is not new to me, it's always good to have another opportunity to explore colour. I'm especially enjoying the chance to make small compositions, just 5 x 7. Practicing putting together line and shape, dark and light, straight and curved, large and small, to make something interesting is time well spent.


Sunday, August 16, 2015

Source material for abstract painting

You've decided you want to try abstract painting. You lay out a 22" x 30" sheet of white paper. Your brushes and paints are at hand.

And now what?

How do you begin?


Award-winning American artist Pat Dews suggests that you begin by working from a photo. It could be one of your own photos, or something that you find in a magazine. The idea is to look at the photo through a viewfinder (a piece of cardboard with a hole cut out, perhaps 2" x 2") and to search for a high-contrast, pleasing area.  Your subject might be only a small fraction of the photograph, but seen in isolation, that small fragment may have all the elements needed for an interesting composition: a variety of shapes in different sizes, a range of darks and lights, and intriguing negative spaces.


I have registered for a one-week workshop with Pat Dews later this month. As well as an extensive materials list, we have been asked to bring to class two failed paintings, 22 x 30.  This is a little problematic for me, as I am not a painter and don't have anything lying around of that size, failed or otherwise.


But I have had a look at some of my photos taken some five years ago and have cropped them severely. I think that these micro-images may provide an interesting starting point for this first foray into abstraction.


Pat relies on photos of natural textures for the "starts" to her sometimes-abstract-sometimes-representational work. She is intrigued by rocks and water. Her final painting often bears little resemblance to the original image, except for the basic organization of shapes.


I like the idea of going out with my camera again, as I used to do years ago, and look for interesting rock formations, tree roots and cracked pavement, to use as inspiration for abstract compositions.


Wednesday, August 12, 2015

Alex Colville at the National Gallery of Canada

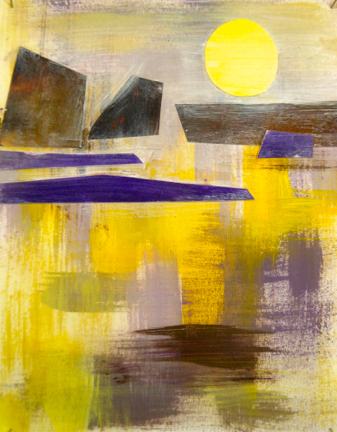
To Prince Edward Island, Alex Colville
Alex Colville: A Canadian Icon, is on display at the National Gallery until September 7, 2015. I have seen this show twice now, first at the Art Gallery of Ontario in the fall, and again last week in Ottawa.

While most Canadians are familiar with Colville's imagery, visitors to the show will learn much about his life (1920 - 2013) and his approach to his art. The almost 100 paintings are grouped thematically, and references to other media (film and literature particularly), to history, and to his own life help us to better understand his work.

Infantry, near Nijmegen, Alex Colville


We see the drawings and paintings he made while working in Europe as an official Canadian war artist, beginning in 1944 at the age of 24. His war experience left Colville with a sense that the forces of chaos could be unleashed at any moment, and this feeling of imminent doom is often conveyed in his paintings.

Horse and Train, Alex Colville


We learn about the tragedy that shaped the life of his wife, Rhoda Wright Colville.  As a young child, most of her family was killed when their car was struck by a train at a level crossing.

Colville often uses train imagery in his work. The exhibition includes a video clip of a Chinese artist who talks about how he and his contemporaries saw their relationship with their own government symbolized in the unsettling image of Horse and Train.


Boy, Dog and St. John River, Alex Colville


A whole gallery is devoted to the many paintings that portray animals, in particular dogs, horses and crows. Colville felt strongly that animals represent pure innocence, and dogs played an important role in his life.


Living Room, Alex Colville


One of the most moving themes in his work, which was a revelation to me, is the ongoing documentation of the lives of the couple. Colville's wife Rhoda was his only model, and it is poignant to note how he lovingly conveys her physical presence and their emotional bond over the course of their 70-year marriage.


Sleeper (Study 10), Alex Colville


More drawings have been added to the exhibition since its first opening in Toronto. Colville's detailed drawings remind me of Renaissance sketches. Many of them include perspective lines and organizing shapes of circles and triangles.


Being able to see the paintings up close reveals the minute brush strokes that combine to create seemingly smooth surfaces. I would recommend this show highly. And if you are unable to get to Ottawa, you might like to experience the show on the website of the National Gallery, which explores the artist's biogaphy, his themes, process, and contemporary responses to his work.

Sunday, August 9, 2015

The art quilts of Karen Schulz

Karen Schulz is an award-winning Washington DC-area artist, whom I met at last year's SAQA conference in Virginia. Karen was on a panel of artists and spoke to the conference about her work, her inspiration, and her career.
Out the In Door, 58 x 66, Karen Schulz
I find Karen's art exciting: her use of hand-dyed cloth, her concern with composition, balance and opposition, her use of shape and line.
Out the In Door, Karen Schulz (detail)
I use fusing to construct my Cityscapes, which involves collaging one shape to another with a heat-activated webbing of glue. Karen's uses "improvisational piecing" as her construction method, sewing one piece to the next. Her lines are created by couching a heavy cord to the quilted piece.
Stonehenge-ish, 28 x 47.5, Karen Schulz
It will soon be four years since I began my Cityscapes series, and I have a sense that I am ready to have my work evolve to a more abstract form of expression. I would also like to work larger, and it would be awkward to do that with my current technique of using heat-away stabilizer to guide my stitching line. Finally, I would like to dispense with mounting my work onto a painted canvas. I feel that while this gives needed "presence" to smaller pieces, it doesn't respect the integrity of the cloth medium. Perhaps larger, unmounted work could find acceptance in a gallery setting.
The Ellipse, 34.5 x 24.5, Karen Schulz
By taking a couple of classes this summer in abstract collage and painting, I hope to develop a better feel for abstract work. Meanwhile, Karen's compositions provide a marker of just what the possibilities are.


Wednesday, August 5, 2015

La Mémoire de Hudson

Fifteen local artists, 15 tributes to Hudson's unique history: here is a sample for you to enjoy. The show continues at the Hudson Community Centre, 392 Main Road, Hudson QC until August 30, as part of the Town's 150th anniversary celebration.
Storms of War: Homage to Hudson's Veterans, Mona Turner
I find Mona's tribute to war veterans poetic and poignant. She was assigned a difficult topic and responded brilliantly. Here is her statement about the piece:
"When the storms of war blew across Europe, Hudsonites answered the call. Twenty-five soldiers lost their lives in WWI and another twenty-five in WWII. The Canada Geese represent those who were lost."

Steamer "The Empress", docked at Hudson Wharf early 1800
Gisèle Lapalme
Like many of the artists, Gisèle Lapalme found a way to make an interesting vertical composition from an essentially horizontal subject.

Reflections, Judith Harvey
Judith Harvey's assignment was the history of glass-making in Hudson. She has chosen some vintage glass as a subject for one of her eloquent still-lifes.

Pleasure Boating, Susan Snelgrove
Using acrylic paint in sepia and grey tones, and acrylic gel "skins", Susan Snelgrove explored the role of pleasure boating in Hudson, focusing on the Hudson Yacht Club and its activities on the Lake of Two Mountains.

All the artists are to be congratulated for rising to the occasion with their thoughtful and thought-provoking work.


Sunday, August 2, 2015

Colour class with Jane Davies, Weeks 1 & 2

Jane Davies' on-line class, "Unlocking the Secrets of Color", has begun. There will be six weekly lessons, and the first class was all about "hue". Each class is accompanied by a set of explanatory notes and a brief video, showing Jane demonstrating the assignment.


Working with acrylic paint, we learned that yellow + blue do not always make a nice clean green. If you choose ultramarine as your primary blue, then you'll get an olive green. And if you choose phthalo blue to mix with red, expecting to get purple, you might get a disappointing "raisin"colour instead.

So, our first assignment was to use various primaries to make four different colour wheels. The objective was to get a nice transition from one colour to the next. I am learning to mix my blues with glazing medium, because otherwise they are so strong and dark that you can barely discern the hue.

Our next assignment was to make four colour grids. We could choose to use all 12 of the colours on the wheel, or we could opt for fewer. We could make a nice, regular grid of squares and rectangles, or we could skew it. We could vary the sizes of the squares and rectangles, or not. All the while, we were to think about our choices, and ask ourselves which makes for a better composition. Are there certain colours we're not comfortable with? Which two colours provide the greatest contrast? The least?

Grid #1, using 11 of the 12 colours available

Grid #2, using 5 colours, grid made of horizontals and verticals

Grid #3, using 5 colours, grid slightly skewed

Grid #4, using 6 colours
An interesting exercise. As always, it's intriguing to see how the other students respond to the assignments, and to read Jane's comments on all the work.

Our assignment for Week 2 was to make a colour wheel by collaging magazine clippings, gift wrap, tissue paper, and other miscellaneous scraps of coloured paper. I decided to go straight to my extensive fabric collection, cutting out squares and fusing them onto cotton.  The objective was not to have 12 separate colour swatches, but a continuum from one colour to the next.

colour wheel made of fabric scraps, fused onto cotton

We were also assigned a single-colour collage, and again I opted to use cloth scraps, stitching them into place. I chose to work with green, going for the full range from yellow-green to blue-green, light, dark, and greyed. This was a fun exercise on a small scale (5 x 7).  I think any of these assignments would be a good activity for my text'art group at one of our monthly meetings.

colour grid using rectangles of green: light, dark, and greyed variations
ranging from blue-green through to yellow-green.