I began with a photo of an arrangement I have at the foot of my driveway, and printed it out to the required size in black and white.
Below you can see the photo taped to my "light table" so that I can trace its shapes onto some heat-away stabilizer. This product is a clear film, and it acts as a placement guide for appliqué shapes and then later as a stitching guide.
At this point I also trace the major appliqué shapes onto a fusible web. I work from the back of the photo so that the shapes are "flipped horizontal".
I auditioned a few different fabrics to serve as the background, looking for something light enough to provide contrast for the black stitching that was to follow. This one screamed "garden" to me, so here it is, with the clear film drawing pinned into place.
Next, I chose some hand-dyed and printed cottons to represent the different elements in the composition.
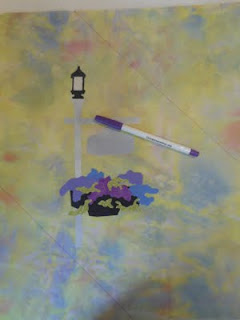
Here's the clear film placement guide, pinned at the top, with the appliqué shapes positioned into place. At this point the film is temporarily removed and a hot iron is used to adhere the appliqué shapes to the background.
As I wanted to have some closely-spaced quilting to hold this top layer to the batting and backing underneath, I used a disappearing-ink marker to lay down a couple of guidelines for diagonal stitching. These stitching lines were broken so that they did not stitch over the appliquéd shapes.
Time to pin the clear film into place so that the black line can serve as a guide for machine stitching with a heavy black thread. I like to offset the stitching line and the shapes by about 1/4 inch.
Here are some of the specialty products that I have used so often over the past few years to transform my own photo images into fibre landscapes.
And now this mini-quilt (measuring the requisite 14" x 10.5") is ready to take its place on a clothesline display celebrating the charms of our little burg.


5 comments:
This is so very pretty -- and your skill in quilting around the floral motif is amazing!
Very nice Heather. Was this your marooned activity?
Great post! Your pictures and explanation of your process are very helpful. Been following your posts for awhile and truly enjoy them.
My blog, fabric, paper, life...
Heather,
I love your beautiful buildings and I learn so much from your posts. Thanks for the details in this one. I am determined to make some art quilts representing interesting buildings in my town. I also dye my own fabric and I'm trying to learn a lot about color through David Hornung's color workshop book.
Thanks for the motivating blog!
Hi Vickie,
Thanks for taking a moment to comment. I dipped into some of your on-line images and I do love your clean lines and saturated colours. David Hornung's workbook is so full of great exercises: perhaps some day I will take a workshop with him.
Best wishes for continuing success with your gorgeous work.
Post a Comment